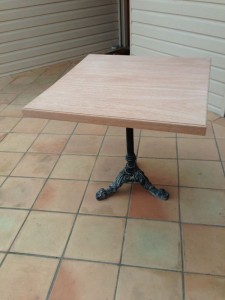
We have a “thing” in Australia. Twice a year, your neighbourhood has a council cleanup day. You put all the things you don’t want on the pavement on a Sunday, and some time that week the council trucks come around and take the no-longer-loved items away. They take their time coming round though, as an entire ecosystem, or economy, has emerged around this tradition.
Every so often I drive past something I can’t believe is being dumped. Last time this happened, it was a spectacular cast iron table base, with a piece of cheap and nasty laminated chipboard in place of the original table top… I couldn’t help myself. I stopped and picked it up:
As you can see it’s a beautiful solid base, with some sick, twisted punishment of a surface appended to it. I’m not actually sure if it was thrown out or it escaped when no-one was looking and was hiding from its tormentors when I found it. First things first, I was off to Wayne’s World in Botany to get some timber. No really.
The guys there had some light Meranti in stock. and sold me a 40 mm thick piece, 2.6m long. I got them to cut it into 3 x 800mm pieces with a bit of offcut and was on my way home. I joined the three pieces using a biscuit-join, alternating heights because the wood is so thick, and glued and clamped the wood for a few days. I weighted it down with paint cans but could probably have put more weight on as it did bow ever so slightly.
The end product came out very solid, and the joins are perfect. They started out visible from the glue run-off but as soon as I sanded it down they were gone.
After a good sanding with a coarse grain paper using an orbital sander, and another sanding with a fine grain, I gave the wood a rounded edge with a slight step, with a plunge router. Worked perfectly. I made a real mess of the last table I did so I made very sure the router bit was tightened up properly. One more light sand over the routed edges and I mounted the new surface on the base
Next up was finishing the timber. I decided that on my patio a light timber was too close to the colour of the house and the tiles so I went for a darker stain. I bought a can of Cabots “Brazilian Roast” stain, paint on and wipe off.
Here’s my assistant applying the stain:
Three or four coats of stain and it was looking great. Here’s the finished stain and the original offcut for comparing
And finally, as the table is going to live outside it needed at least four coats of clear varnish. I opted for a satin finish as the shinier finishes tend to wear poorly with kids. Four coats later, with some sanding in between coats, and it’s officially “done”
It’s almost impossible to see the joins in the timber, the finish came up perfectly, and the colour works a treat. Now I need to find a couple of matching chairs.


most impressed… you have honoured that base beautifully!